JPA로 DB Read 수행하기
✒️ 2025-05-28 14:03 내용 수정
스프링부트3 자바 백엔드 개발입문 내용 참고 및 정리
- 이전에 Spring boot 수업에선 MyBatis를 사용하여 CRUD를 진행했다. 이번에는 참고서의 내용으로 JPA를 사용하여 H2 DB에 CRUD를 수행하는 실습을 진행했다.
- 템플릿 엔진도 Thymeleaf 대신 Mustache를 사용했다.
- JPA로 DB Create 수행하기에 이어 이번엔 데이터를 DB에 요청해서 가져오는 과정을 실습했다.
DB에 데이터를 요청하는 과정
- JPA에서 DB로 데이터를 요청하는 과정을 정리하면 다음과 같다.
- 사용자가 브라우저에서 URL 요청을 전송한다.
- 서버의 Controller에서 요청을 받아 해당 URL이 적용된 메소드에서 찾으려는 데이터의 정보를
Repository에 전달한다. Repository는 정보를 받아 DB에 데이터를 조회한다.- DB에서 데이터를 가져오는 주체는
Repository이다.
- DB에서 데이터를 가져오는 주체는
- DB에서는 해당 데이터를 찾아
Entity로 반환한다. - 서버는
Model을 통해Entity를 view 템플릿으로 전달하고, 정보를 담은 페이지가 화면에 표시된다.
단일 데이터 조회하기
- 먼저 조회할 데이터 요청 방법을 설정하기 위해
ArticleController에 새 메소드와@GetMapping을 추가한다.@GetMapping("{id}")는 요청의 경로 변수의 key가 id임을 명시한다.articles/1과 같은 요청이 들어오면 경로 변수(path variable)은{ "id" : "1" }가 된다.
- 메소드의 args에 경로 변수를 지정하는 Annotation
@PathVariable datatype name을 사용하여 URL 요청으로 들어온 전달값을 Controller의 매개변수로 사용할 수 있게 설정한다. 그리고 DB에서 조회한 데이터를 View로 전달해줄Model도 추가한다. CrudRepository를 상속 받은ArticleRepository의 메소드 중Optional<T> findById(ID id)는 DB에서 id를 기반으로 데이터를 찾아준다. 이 때 반환값은Optional<T>이므로 상황에 맞게 수정하려면Optional<Article>로 수정하거나,findById(id).orElse(null)을 사용하여 조회하려는 id를 가진 데이터가 없을 때 null을 반환하도록 설정한다.
package com.example.demo.controller;

import com.example.demo.DTO.ArticleForm;
import com.example.demo.entity.Article;
import com.example.demo.repository.ArticleRepository;
import lombok.extern.slf4j.Slf4j;
import org.springframework.beans.factory.annotation.Autowired;
import org.springframework.stereotype.Controller;
import org.springframework.ui.Model;
import org.springframework.web.bind.annotation.GetMapping;
import org.springframework.web.bind.annotation.PathVariable;
import org.springframework.web.bind.annotation.PostMapping;
import org.springframework.web.bind.annotation.RequestMapping;

import java.util.Iterator;
import java.util.Optional;

@Controller
@RequestMapping("/articles")
@Slf4j // simple logging facade for java
public class ArticleController {

    @Autowired
    private ArticleRepository articleRepository;

    @GetMapping("new")
    public String newArticleForm() {
        return "/articles/new";
    }

    @PostMapping("create")
    public String createArticle(ArticleForm form) {
        Article article = form.toEntity();
        Article saved = articleRepository.save(article);
        return "";
    }

    @GetMapping("{id}")  // 경로 매개변수 사용
    public String show(@PathVariable Long id, Model model) {
        log.info("id = " + id);  // 로그 확인
        Article articleEntity = articleRepository.findById(id).orElse(null);  // id로 조회
        model.addAttribute("article", articleEntity);
        return "/articles/show";  // id로 조회할 데이터를 보여줄 view
    }
}
- Controller 설정이 완료되었다면 이번엔
src/main/resources/templates/articles폴더에show.mustache파일을 만들어 조회한 데이터를 출력할 화면을 구성한다.- bootstrap의 table 예시 코드를 변형해 사용했다.
- https://getbootstrap.com/docs/5.3/content/tables/#overview
- mustache에서 객체의 속성에 접근할 때는
{{Object.property}}를 사용하며, 객체나 배열의 사용 범위를 지정해 범위 내에서 속성을 꺼내 사용할 수 있다.- Mustache#문법 참고.
<!doctype html>
<html lang="ko">
<head>
    <meta charset="UTF-8">
    <meta name="viewport"
          content="width=device-width, user-scalable=no, initial-scale=1.0, maximum-scale=1.0, minimum-scale=1.0">
    <meta http-equiv="X-UA-Compatible" content="ie=edge">
    <link href="https://cdn.jsdelivr.net/npm/bootstrap@5.3.3/dist/css/bootstrap.min.css" rel="stylesheet" integrity="sha384-QWTKZyjpPEjISv5WaRU9OFeRpok6YctnYmDr5pNlyT2bRjXh0JMhjY6hW+ALEwIH" crossorigin="anonymous">
    <script src="https://cdn.jsdelivr.net/npm/bootstrap@5.3.3/dist/js/bootstrap.bundle.min.js" integrity="sha384-YvpcrYf0tY3lHB60NNkmXc5s9fDVZLESaAA55NDzOxhy9GkcIdslK1eN7N6jIeHz" crossorigin="anonymous"></script>
    <title>SpringBoot Example</title>
</head>
<body>
{{> layouts/header }}

<section>
    <div class="inner p-5">
        <h1>Article #{{article.id}}</h1>
        <table class="table">
            <thead>
            <tr>
                <th scope="col">Id</th>
                <th scope="col">Title</th>
                <th scope="col">Content</th>
            </tr>
            </thead>
            <tbody>
			{{! article 데이터의 속성을 꺼내서 표시 }}
			{{#article}}
            <tr>
                <th scope="row">{{id}}</th>
                <td>{{title}}</td>
                <td>{{content}}</td>
            </tr>
            {{/article}}
            </tbody>
        </table>
    </div>
</section>

{{> layouts/footer }}
</body>
</html>
- 이번엔
ArticleEntity의 기본 생성자를 추가한다. Lombok의@NoArgsConstructor를 사용하면 argument가 없는 생성자를 추가할 수 있다.- 생성자가 없는 경우
No Default constructor for entity에러가 발생한다. @GeneratedValue(stratege = GenerationType.IDENTITY)을 사용하면 식별자인id가 자동으로 증가하도록 설정할 수 있다.- MySQL의
Auto Increment나 Oracle의Sequence를 적용한 것과 비슷하다.
- MySQL의
- 생성자가 없는 경우
package com.example.demo.entity;

import jakarta.persistence.Column;
import jakarta.persistence.Entity;
import jakarta.persistence.GeneratedValue;
import jakarta.persistence.Id;
import lombok.Data;
import lombok.NoArgsConstructor;

@Entity // Entity임을 명시하는 Annotation
@Data // Lombok
@NoArgsConstructor  // argument가 없는 생성자 추가
public class Article {

	@Id // 식별자
	@GeneratedValue(strategy = GenerationType.IDENTITY)  // 자동 생성 전략
	private Long id;

    @Column // DB에서 열과 대응되는 속성
    private String title;

    @Column
    private String content;

    public Article(Long id, String title, String content) {
        this.id = id;
        this.title = title;
        this.content = content;
    }
}
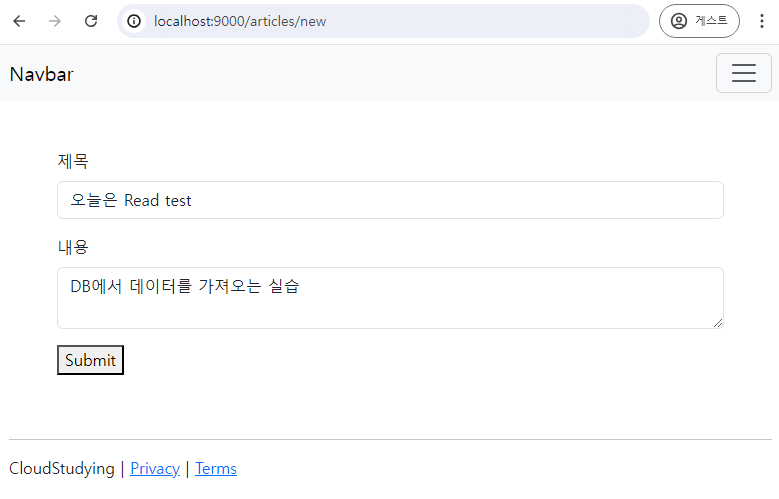
- 설정 완료 후 서버를 재시작하고, JPA로 DB Create 수행하기에서 제작한
http://localhost:9000/articles/newurl로 데이터를 작성한다.- H2 DB는 메모리에 저장되므로 서버를 재실행할 때마다 데이터가 초기화된다.
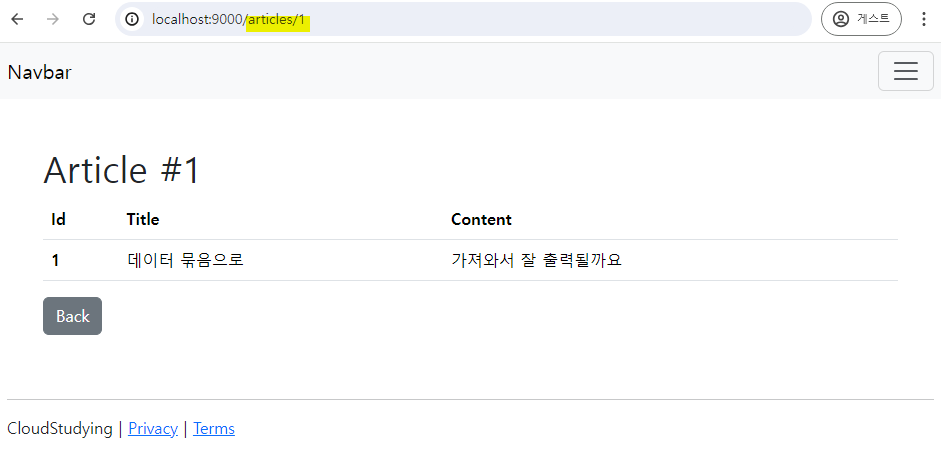
- 데이터 추가 후
http://localhost:9000/articles/1를 브라우저에 입력해 DB로부터 데이터를 잘 가져오는지 확인한다.
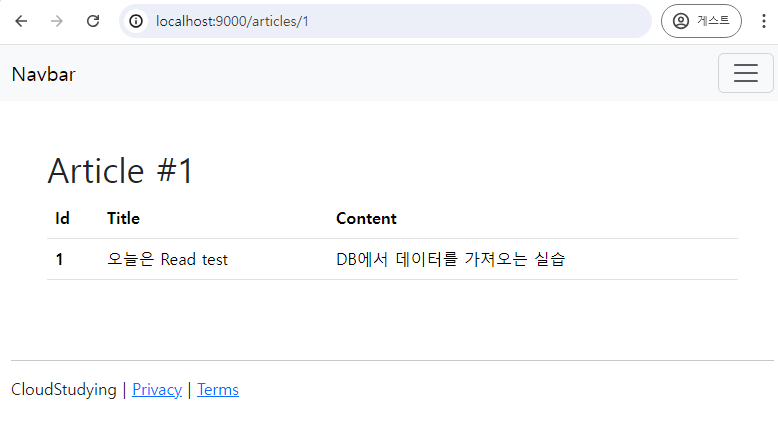
ArticleController에서log.info()로 작성한 내용은 터미널에서 확인할 수 있다.

데이터 리스트 조회하기
- 위에서 데이터 1개를 가져오는 방법을 적용했는데, 이번엔 여러 개의 데이터를 가져오도록 수정한다.
- 데이터 상세보기 및 목록 페이지를 추가하면서 라우팅 역시 같이 수정한다.
- 먼저
ArticleController에 리스트를 출력할 메소드와@GetMapping을 추가한다.Iterable<T> findAll()는 해당Repository에 있는 모든 값을 가져오며, 반환값을 형변환하거나Repository의findAll()메소드를 오버라이드하여 반환 값을ArrayList<Article>로 설정한다.
- 글을 추가하는
@PostMapping()매핑의 메소드에서 글 추가가 완료되면 추가된 글의 페이지로 이동하도록redirect를 설정하기 위해return "redirect:/articles/" + saved.getId();로 수정한다.ArticleEntity에서@DataLombok Annotation을 추가했다면 getter와 setter가 모두 자동으로 추가된다.
package com.example.demo.controller;

import com.example.demo.DTO.ArticleForm;
import com.example.demo.entity.Article;
import com.example.demo.repository.ArticleRepository;
import lombok.extern.slf4j.Slf4j;
import org.springframework.beans.factory.annotation.Autowired;
import org.springframework.stereotype.Controller;
import org.springframework.ui.Model;
import org.springframework.web.bind.annotation.GetMapping;
import org.springframework.web.bind.annotation.PathVariable;
import org.springframework.web.bind.annotation.PostMapping;
import org.springframework.web.bind.annotation.RequestMapping;

import java.util.Iterator;
import java.util.List;
import java.util.Optional;

@Controller
@RequestMapping("/articles")
@Slf4j // simple logging facade for java
public class ArticleController {

    @Autowired
    private ArticleRepository articleRepository;

    @GetMapping("/")  // 데이터 리스트 출력
    public String list(Model model) {
	    // Iterable<T> findAll() 메소드이므로 형변환을 적용
        List<Article> list = (List<Article>) articleRepository.findAll();
        model.addAttribute("articles", list);
        return "/articles/list";
    }

    @GetMapping("new")
    public String newArticleForm() {
        return "/articles/new";
    }

	@PostMapping("create")
	public String createArticle(ArticleForm form) {
	    Article article = form.toEntity();
	    Article saved = articleRepository.save(article);
	    return "redirect:/articles/" + saved.getId();  // 글을 추가하면 해당 글 상세보기로 이동
	}

	@GetMapping("{id}")  // 경로 매개변수 사용
	public String show(@PathVariable Long id, Model model) {
	    log.info("id = " + id);  // 로그 확인
	    Article articleEntity = articleRepository.findById(id).orElse(null);  // id로 조회
	    model.addAttribute("article", articleEntity);
	    return "/articles/show";  // id로 조회할 데이터를 보여줄 view
	}

}
src/main/resources/templates/articles폴더에list.mustache파일을 생성하여Model로부터 받아온 데이터를 표시할 수 있도록 화면을 구성한다.- mustache에서 문법에 사용된 변수가 데이터 묶음인 경우엔 내부 코드가 반복되어 실행된다.
Write Article버튼을 누르면 글 추가 페이지로 이동하도록<button>의onclick="location.href='/articles/new'"이번트 리스너를 설정했다.- 글 제목을 누르면 해당 글의 상세보기 페이지로 이동하도록 설정했다.
<!doctype html>
<html lang="ko">
<head>
    <meta charset="UTF-8">
    <meta name="viewport"
          content="width=device-width, user-scalable=no, initial-scale=1.0, maximum-scale=1.0, minimum-scale=1.0">
    <meta http-equiv="X-UA-Compatible" content="ie=edge">
    <link href="https://cdn.jsdelivr.net/npm/bootstrap@5.3.3/dist/css/bootstrap.min.css" rel="stylesheet" integrity="sha384-QWTKZyjpPEjISv5WaRU9OFeRpok6YctnYmDr5pNlyT2bRjXh0JMhjY6hW+ALEwIH" crossorigin="anonymous">
    <script src="https://cdn.jsdelivr.net/npm/bootstrap@5.3.3/dist/js/bootstrap.bundle.min.js" integrity="sha384-YvpcrYf0tY3lHB60NNkmXc5s9fDVZLESaAA55NDzOxhy9GkcIdslK1eN7N6jIeHz" crossorigin="anonymous"></script>
    <title>SpringBoot Example</title>
</head>
<body>
{{> layouts/header }}

<section>
    <div class="inner p-5">
        <h1>Articles</h1>
        <table class="table">
            <thead>
            <tr>
                <th scope="col">Id</th>
                <th scope="col">Title</th>
                <th scope="col">Content</th>
            </tr>
            </thead>
            <tbody>
            {{#articles}}
                <tr>
                    <th scope="row">{{id}}</th>
                    <td><a href="/articles/{{id}}">{{title}}</a></td>
                    <td>{{content}}</td>
                </tr>
            {{/articles}}
            </tbody>
        </table>
        <button type="button" class="btn btn-primary" onclick="location.href='/articles/new'">Write Article</button>
    </div>
</section>

{{> layouts/footer }}
</body>
</html>
- 페이지 이동의 편의성을 위해
header.mustache의 nav에서href부분들을 수정한다.
<header>
    <nav class="navbar navbar-expand-lg bg-body-tertiary">
        <div class="container-fluid">
            <a class="navbar-brand" href="/">Navbar</a>
            <button class="navbar-toggler" type="button" data-bs-toggle="collapse" data-bs-target="#navbarNav" aria-controls="navbarNav" aria-expanded="false" aria-label="Toggle navigation">
                <span class="navbar-toggler-icon"></span>
            </button>
            <div class="collapse navbar-collapse" id="navbarNav">
                <ul class="navbar-nav">
                    <li class="nav-item">
                        <a class="nav-link active" aria-current="page" href="/articles/">Article</a>
                    </li>
                    <li class="nav-item">
                        <a class="nav-link" href="/articles/new">Write Article</a>
                    </li>
                </ul>
            </div>
        </div>
    </nav>
</header>
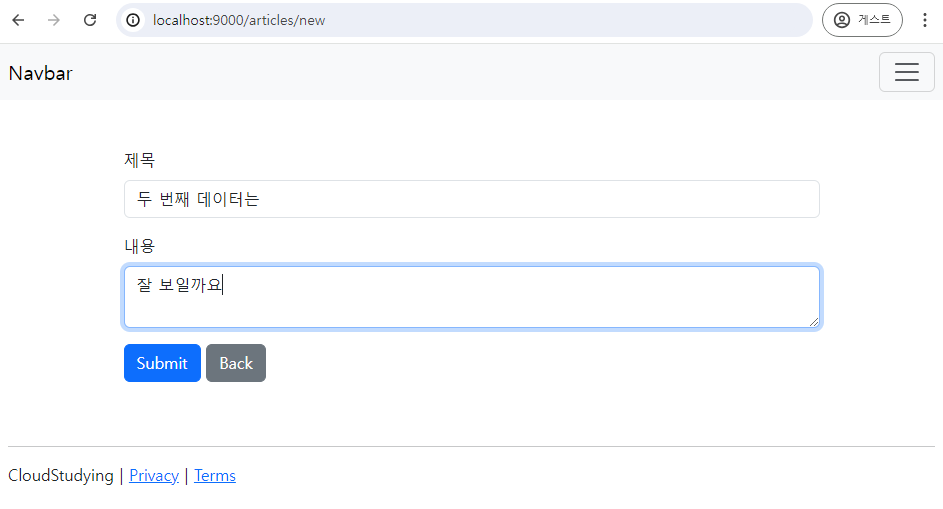
- 글 작성 페이지에서도 목록으로 돌아가기 버튼을 추가한다.
<!doctype html>
<html lang="ko">
<head>
    <meta charset="UTF-8">
    <meta name="viewport"
          content="width=device-width, user-scalable=no, initial-scale=1.0, maximum-scale=1.0, minimum-scale=1.0">
    <meta http-equiv="X-UA-Compatible" content="ie=edge">
    <link href="https://cdn.jsdelivr.net/npm/bootstrap@5.3.3/dist/css/bootstrap.min.css" rel="stylesheet" integrity="sha384-QWTKZyjpPEjISv5WaRU9OFeRpok6YctnYmDr5pNlyT2bRjXh0JMhjY6hW+ALEwIH" crossorigin="anonymous">
    <script src="https://cdn.jsdelivr.net/npm/bootstrap@5.3.3/dist/js/bootstrap.bundle.min.js" integrity="sha384-YvpcrYf0tY3lHB60NNkmXc5s9fDVZLESaAA55NDzOxhy9GkcIdslK1eN7N6jIeHz" crossorigin="anonymous"></script>
    <title>SpringBoot Example</title>
</head>
<body>
    {{> layouts/header }}

    <section>
        <div class="inner p-5">
                <form action="/articles/create" method="POST" class="container">
                    <div class="mb-3">
                        <label class="form-label">제목</label>
                        <input type="text" class="form-control" name="title">
                    </div>
                    <div class="mb-3">
                        <label class="form-label">내용</label>
                        <textarea class="form-control" name="content"></textarea>
                    </div>
                    <button type="submit" class="btn btn-primary">Submit</button>
                    <button type="button" class="btn btn-secondary" onclick="location.href='/articles/'">Back</button>
                </form>
        </div>
    </section>

    {{> layouts/footer }}
</body>
</html>
- 글 상세보기 페이지에서도 목록으로 돌아가기 버튼을 추가한다.
<!doctype html>
<html lang="ko">
<head>
    <meta charset="UTF-8">
    <meta name="viewport"
          content="width=device-width, user-scalable=no, initial-scale=1.0, maximum-scale=1.0, minimum-scale=1.0">
    <meta http-equiv="X-UA-Compatible" content="ie=edge">
    <link href="https://cdn.jsdelivr.net/npm/bootstrap@5.3.3/dist/css/bootstrap.min.css" rel="stylesheet" integrity="sha384-QWTKZyjpPEjISv5WaRU9OFeRpok6YctnYmDr5pNlyT2bRjXh0JMhjY6hW+ALEwIH" crossorigin="anonymous">
    <script src="https://cdn.jsdelivr.net/npm/bootstrap@5.3.3/dist/js/bootstrap.bundle.min.js" integrity="sha384-YvpcrYf0tY3lHB60NNkmXc5s9fDVZLESaAA55NDzOxhy9GkcIdslK1eN7N6jIeHz" crossorigin="anonymous"></script>
    <title>SpringBoot Example</title>
</head>
<body>
{{> layouts/header }}

<section>
    <div class="inner p-5">
        <h1>Article #{{article.id}}</h1>
        <table class="table">
            <thead>
            <tr>
                <th scope="col">Id</th>
                <th scope="col">Title</th>
                <th scope="col">Content</th>
            </tr>
            </thead>
            <tbody>            {{#article}}
            <tr>
                <th scope="row">{{id}}</th>
                <td>{{title}}</td>
                <td>{{content}}</td>
            </tr>
            {{/article}}
            </tbody>
        </table>
        <button type="button" class="btn btn-secondary" onclick="location.href='/articles/'">Back</button>
    </div>
</section>

{{> layouts/footer }}
</body>
</html>
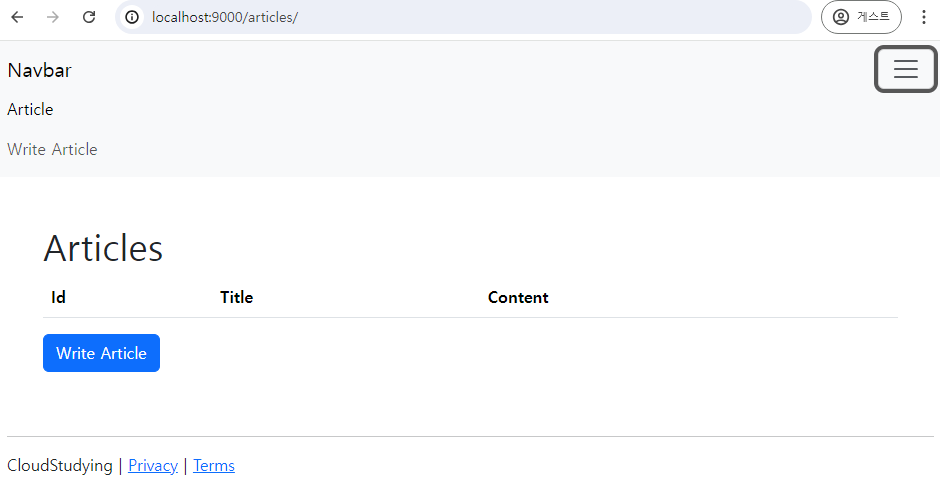
- 처음 서버를 재실행하면 메모리에 저장된 데이터가 초기화되므로 아무 데이터도 뜨지 않는다.
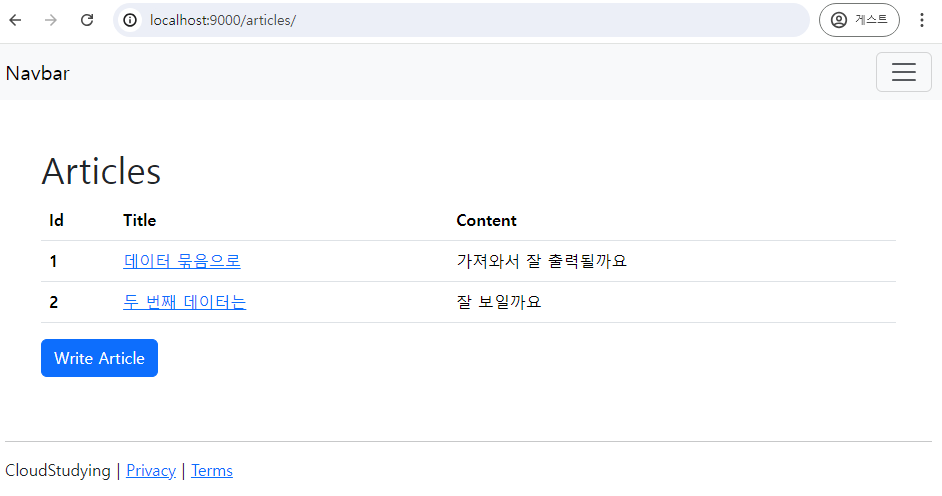
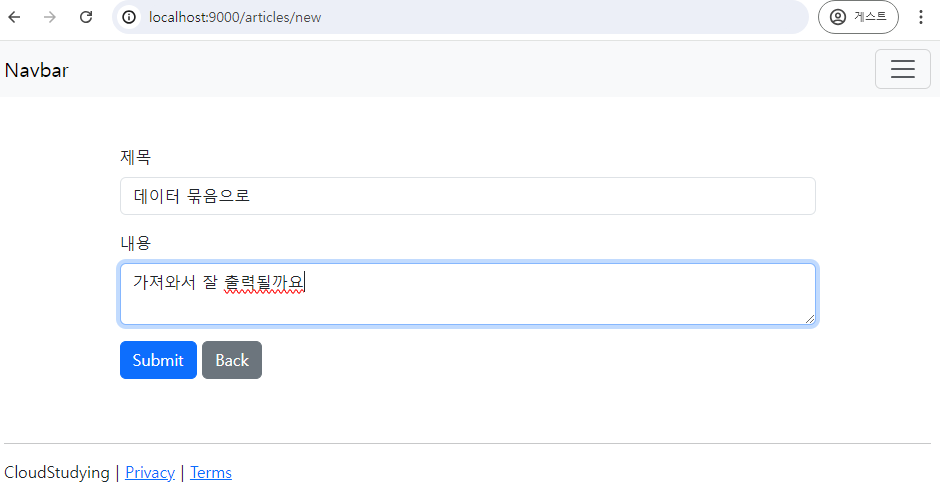
- 버튼을 누르거나 nav에서 설정한 링크로 글 작성 페이지로 이동한다.
- 글을 추가한다.
- 글 추가 후엔 작성된 글의 상세보기로 이동된 것을 url로 확인할 수 있다.
- 다른 데이터를 추가한 후에도 목록 페이지에서 데이터가 잘 보이는 것을 확인할 수 있다.